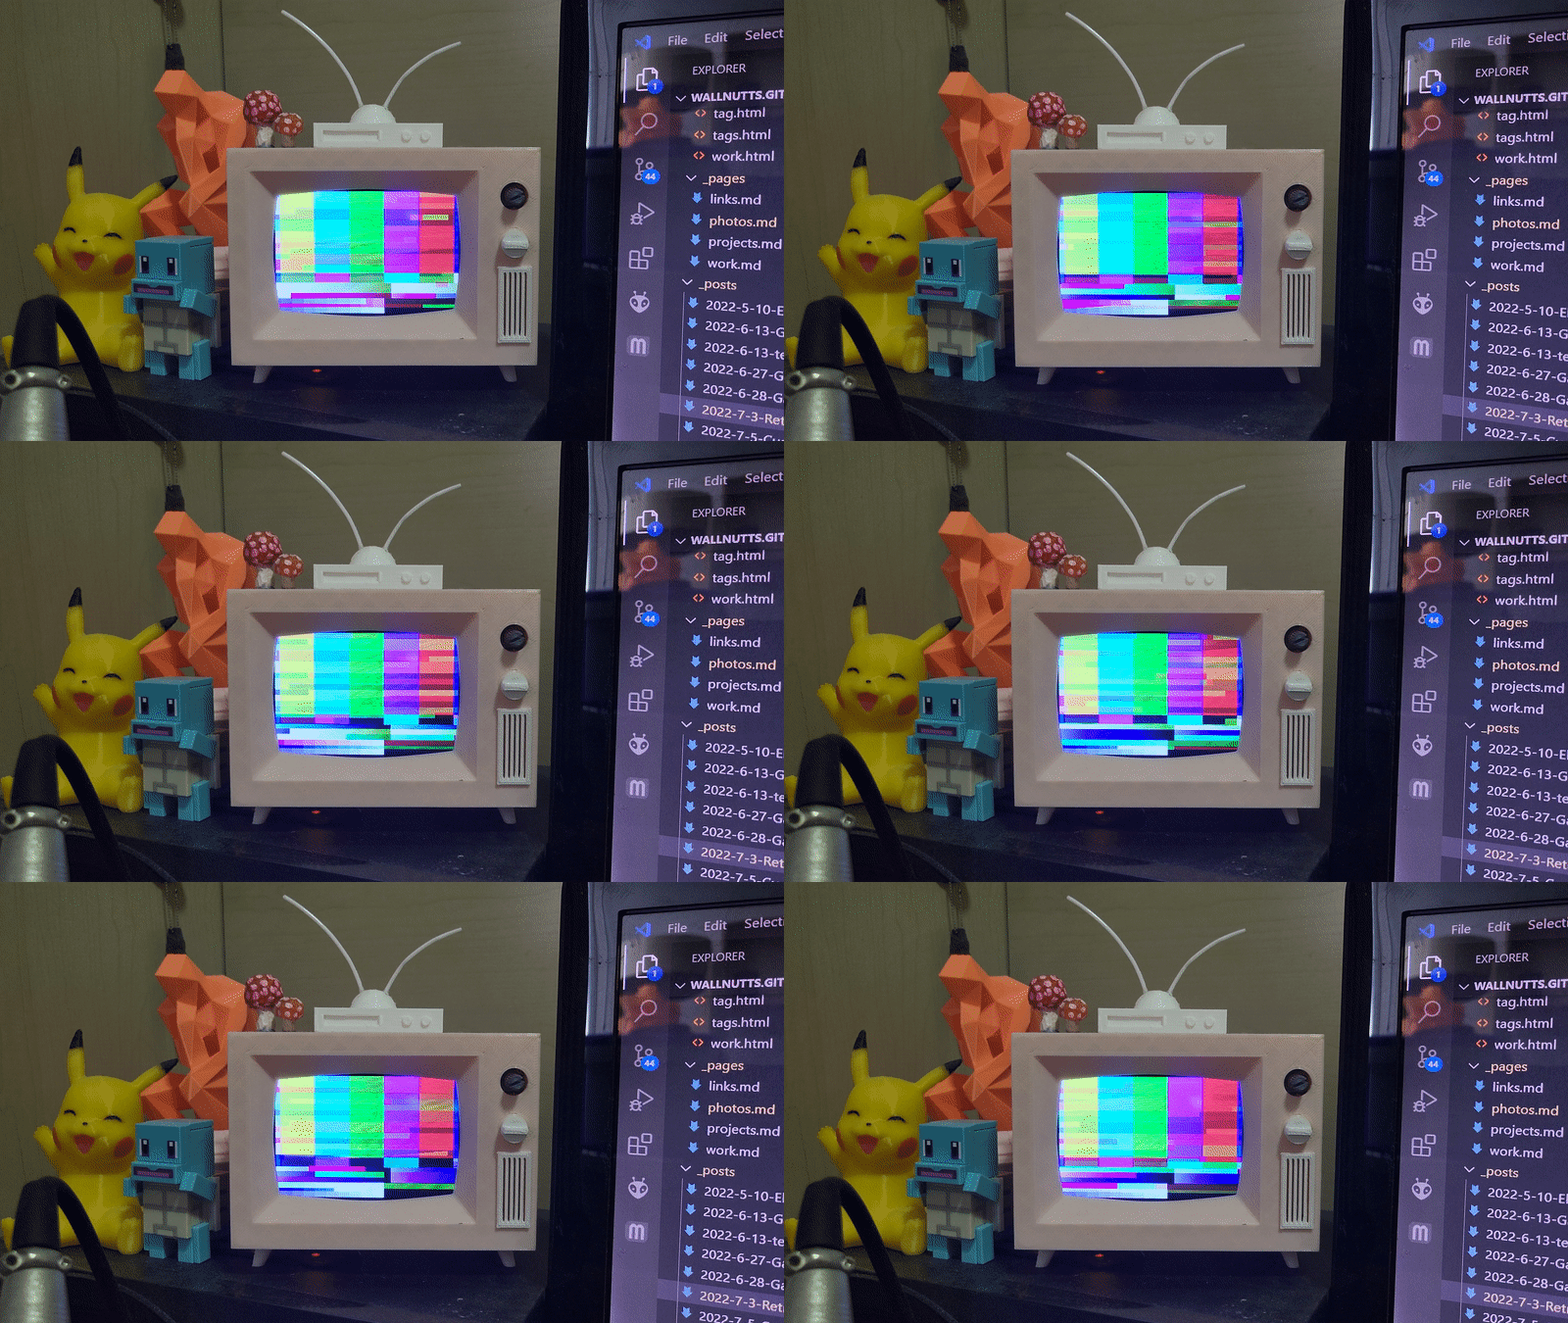
A fun little Desk TV that loops over videos you add in a public youtube playlist. The materials you can use may vary but this project will be using a Pi Zero W and a generic 3.5 inch SPI display.
I was inspired by the SimpsonsTV project by Brandown Withrow but I wanted to make my own spin on it. I personally use it to loop over flashy Kpop videos or old cartoons available on youtube. Operation is pretty plug and play once you set it u. Just plug in external USB-C power from a spare usb port or phone charger to make it work. The raspbian image on it is also read only, a useful way to ensure that the sd card does not corrupt everytime u unplug it and allows you to not use a power button.
Some limitations however, given the relatively slow Pi Zero W, theres is a certain amount of loading time between each video playing where I have included a mock static video to play between loads. As is common to other SPI display, the framerate is pretty horrible which neccesitates the use of the fbcp-ili9341 driver. PWM audio out is also used with a low pass filter to drive a small 8ohm speaker for audio.
This also uses omxplayer included with legacy debian buster, where the mock static.mp4 loops on layer 1 and the obtained youtube videos on layer 2. Hence allowing for a pretty simple script to be made using 2 simultaneous omxplayer instances. I could not manage to get this to work with VLC player on the newer raspbian versions.
Items Needed
- Pi Zero W
- 3.5 inch SPI display
- USB-C Breakout board
Speaker parts:
- PAM8304 Audio Amp w/ integrated Knob
- 8 Ohm Speaker
- 270 Ohm Resistor
- 150 Ohm Resistor
- 10nF / 33nF capacitor (labelled 103 or 333 respectively)
- 1uF electrolytic capacitor
Build Guide
Hardware portion
Print out the STLs here ( I did not design the files credits goes to H5Labs )
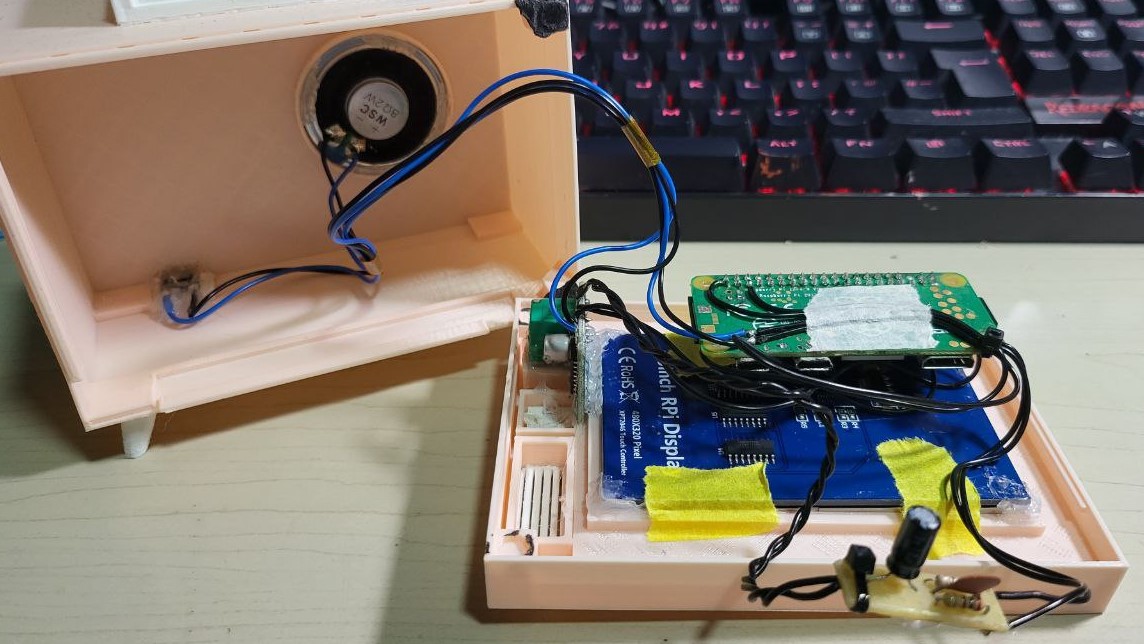

Should be pretty and easy to wire up. I used a small piece of perf board for the low-pass filter. Pi Zero and PAM8304 are wired in parallel to the USB-C breakout board. I hot glued the PAM8304 onto the case so its up to you how u mount it.
The Pi Zero does not have an audio jack but it does allow for analog audio out using its PWM pins. Unlike its other larger variants like the Pi 4, the PWM audio output is unfiltered and a low-pass filter will reduce much of the noise. I decided to use mono audio out on GPIO19 as seen in the diagram.
For more details on the low-pass filter see here and here
Add this to the bottom of /boot/config.txt to enable audio. Do change the pins to suit your arrangements.
dtoverlay=pwm-2chan,pin=19,func=2,pin2=13,func2=4
Software portion
!! Important! - make sure to use Debian Buster for this !!
Newer versions of Raspbian have moved to VLC player as the default video player but this project relies on omxplayer which is much easier to obtain on the older Debian Buster version. You can find this in the Raspberry Pi Imager app under choose os » Raspberry Pi OS (other) » Raspberry Pi OS (legacy) w/ desktop. Make sure u enable wifi and are able to SSH into it.
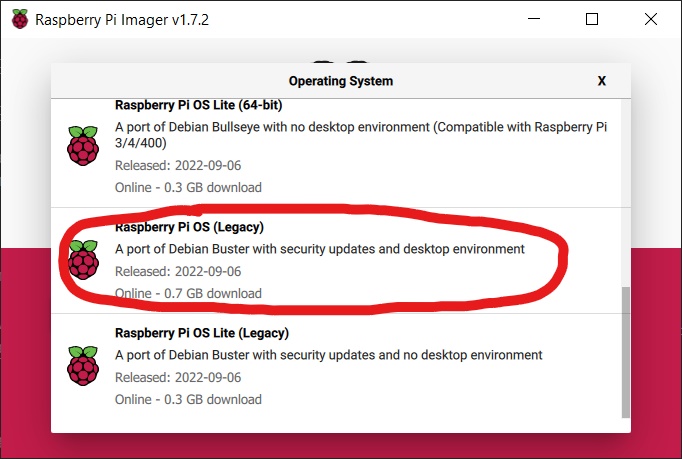
Install it onto an SD card, put it in your pi and SSH into it.
Getting the LCD to work
Although certain manufacturers provide drivers themselves for SPI displays im going to instead use the fbcp-ili9341 driver by juj. I found that it provided better framerates and a much nicer viewing experience compared to those supplied by adafruit or other manufacturers.
Just follow the instructions provided in the link to install drivers for your display. Since mines a random generic one, I had to undergo some trial and error with the cmake options below to hone in on one that works. Its better if you read up the github page for more details as my cmake options will likely to be incompatible with your LCD.
sudo nano /boot/config.txt

#add these at the bottom
hdmi_group=2
hdmi_mode=87
hdmi_cvt=480 320 60 1 0 0 0 #change this to suit your resolution
hdmi_force_hotplug=1
Remove anything with dtoverlay=pitft28r/waveshare32b/flexfb or similar. Remove dtparam=spi=on if its there.
Install LCD drivers
sudo apt-get install cmake
cd ~
git clone https://github.com/juj/fbcp-ili9341.git
cd fbcp-ili9341
mkdir build
cd build
cmake -DWAVESHARE35B_ILI9486=ON -DSPI_BUS_CLOCK_DIVISOR=20 -DDISPLAY_BREAK_ASPECT_RATIO_WHEN_SCALING=ON ..
make -j
sudo ./fbcp-ili9341
Make LCD run on startup
sudo nano /etc/rc.local
At the bottom of rc.local add:
sudo /home/pi/fbcp-ili9341/build/fbcp-ili9341 &
Reboot and verify everything works. Hopefully it should right?
Making a youtube playlist
Optional I installed this chrome extension to make adding videos in batches easier.
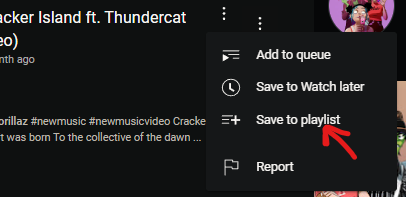
Save a video to playlist
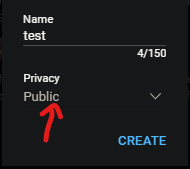
Make sure its set to ‘Unlisted’ or ‘Public’
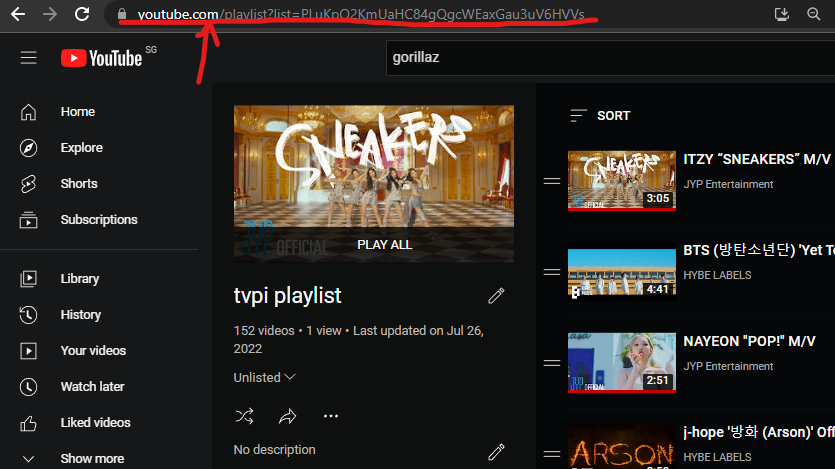
Copy down the playlist link in the address bar
Installing the python script
Make sure u have python and pip installed. Install yt-dlp also:
python3 -m pip install -U yt-dlp
Clone my repo
git clone https://github.com/Wallnutts/Simple-Youtube-Playlist-Looper-Script.git
cd Simple-Youtube-Playlist-Looper-Script
sudo nano player.py
Change “PUT-YOUR-LINK-HERE” under playlistlink at the top to your youtube playlist link and save. Then test the script using:
python player.py
Make python script run on startup
sudo nano /etc/systemd/system/tvplayer.service
Add this and save
[Unit]
Description=tvplayer
After=network.target

[Service]
WorkingDirectory=/home/pi/simpsonstv/
ExecStart=/usr/bin/python /home/pi/simpsonstv/player.py
Restart=always

[Install]
WantedBy=multi-user.target
enable the service to start on boot
sudo systemctl enable tvplayer.service
Optional customisation options
Between loading each video the static video under /Simple-Youtube-Playlist-Looper-Script/assets/static.mp4 will loop endlessly. I managed to obtain this on a stock video website and downscaled it using handbrake to 480 X 320 to fit the LCD resolution. Do change it if u wish to.
Near the bottom of the script you can change some options pertaining to how the videos are displayed
commandyt = 'omxplayer --layer 2 --no-osd --aspect-mode fill `yt-dlp -g -f 18 --no-warnings --playlist-items ' + str(randomlist[x-1]) + " " + playlistlink + '`'
Available options: –aspect-mode letterbox/fill/stretch
I found that aspect-mode fill works for most videos but due to the aspect ratio of the LCD the edges will get cut off. Some videos have a wider aspect ratio so sometimes black bars on the top and bottom may show.
Available options: -f 18
See here and here This controls the resolution and format to play the video at. Since the LCD is only 480 X 320, I used 18, which indicated 360p audio+video in .mp4 format. Do check out the attached links for additional details.
Read-Only System for safe unplugging
See more here
Make sure this is the final step before editing any additional files. This makes sure that force unplugging the Pi Zero W wont corrupt the SD card.
sudo raspi-config
Performance Options » Overlay File System » Yes to both questions and reboot
Congrats on making it this far! Hope you enjoy your DeskTV!
